 A Langy Energy guide
How to Install a Solar Attic Fan: Step-by-Step Guide for DIYers
Installing a solar attic fan yourself takes about two to four hours and can dramatically reduce attic heat while cutting your energy bills.
A solar attic fan keeps your attic cooler by venting hot air without adding to your electric bill. Most homeowners can install one in a single afternoon with basic carpentry skills and a few common tools. This guide walks you through measuring your attic, choosing the right location, cutting the roof opening, and wiring everything so your new fan runs quietly and efficiently.
What You Need Before You Start
Gather your tools and materials before climbing onto the roof. You’ll avoid multiple trips up the ladder and finish faster.
Tools required:
- Drill with 1/4-inch bit
- Reciprocating saw or jigsaw
- Measuring tape and chalk line
- Roofing cement and caulk gun
- Screwdriver or impact driver
- Safety harness and non-slip shoes
- Stud finder (for locating rafters)
Materials to have on hand:
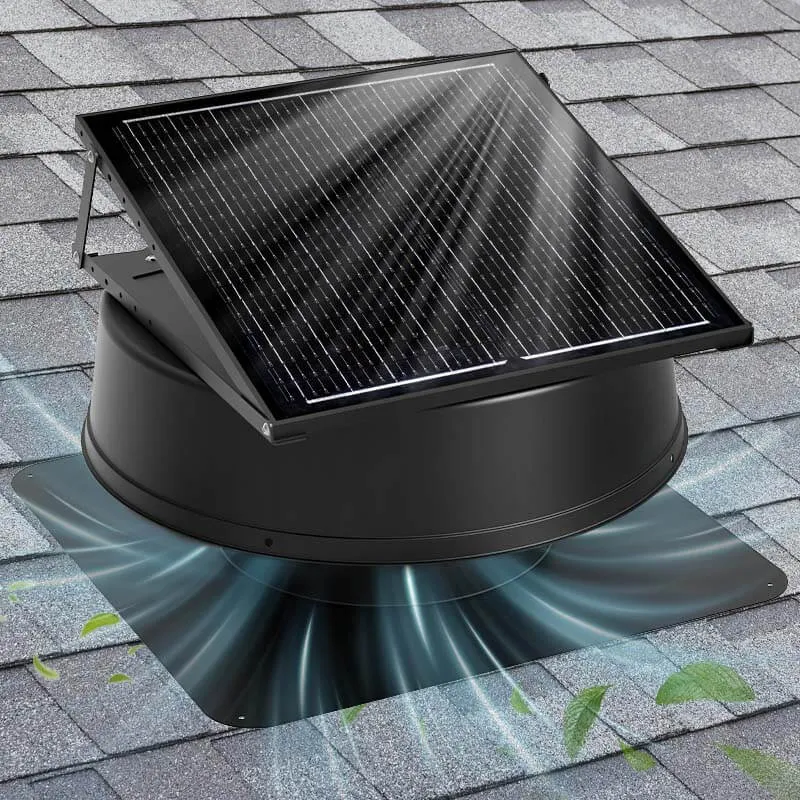
- Your solar attic fan unit with mounting hardware
- Roofing nails or screws (typically 1.5-inch galvanized)
- Extra roofing cement or flashing tape
- Work gloves and safety glasses
Check the weather forecast and pick a dry, calm day. Wet shingles are dangerously slippery, and wind makes roof work risky. Most units come with a template and installation manual, so read through the instructions completely before you begin.
Choosing the Right Roof Location
Placement determines how well your fan performs. We recommend positioning your unit on the side of the roof that receives the most direct sunlight, typically the south-facing slope in the Northern Hemisphere. More sun means the solar panel generates more power and the fan runs longer each day.
Key placement considerations:
- Rafter spacing: Locate a spot between two rafters, not over one. Most residential roofs have rafters spaced 16 or 24 inches on center.
- Obstructions: Avoid areas shaded by trees, chimneys, or HVAC vents. Even partial shade cuts solar efficiency dramatically.
- Interior clearance: From inside the attic, verify there are no wires, ducts, or bracing in the way.
- Roof pitch: Steeper roofs (above 6/12 pitch) may need additional fall protection and make installation more challenging.
Mark your chosen spot from inside the attic by driving a nail or drill bit through the roof deck as a reference point. Then head outside and measure from that marker to center your fan template.
Cutting the Roof Opening and Mounting the Fan
This is the most critical step. Measure twice, cut once, and take your time to avoid leaks.
Step-by-step installation process:
- Trace the template: Place the cardboard or plastic template (included with most units) over your marked location. Trace the outline with chalk or a marker.
- Drill starter holes: Drill a 1/4-inch hole at each corner of the traced outline. These guide your saw blade and prevent overcuts.
- Cut from inside: Go back into the attic and use your reciprocating saw or jigsaw to cut along the outline from underneath. Cutting from inside gives you better control and keeps debris out of the fan housing later.
- Remove shingles carefully: Lift or remove the shingles around the opening. You may need to pull a few nails with a pry bar. Try not to damage surrounding shingles, you’ll tuck the fan flashing under them.
- Test-fit the unit: Set the fan in the opening without fastening it. The flashing should slide under the upper shingles and sit on top of the lower ones, directing water downhill.
- Apply roofing cement: Run a bead of roofing cement around the underside edge of the flashing. This creates a watertight seal against the roof deck.
- Secure the fan: Fasten the unit with the provided screws or nails, typically around the perimeter flange. Don’t overtighten or you may crack the housing.
- Seal all edges: Apply another bead of roofing cement over the exposed nail heads and along the top and side edges of the flashing. Press down the shingles so they adhere to the cement.
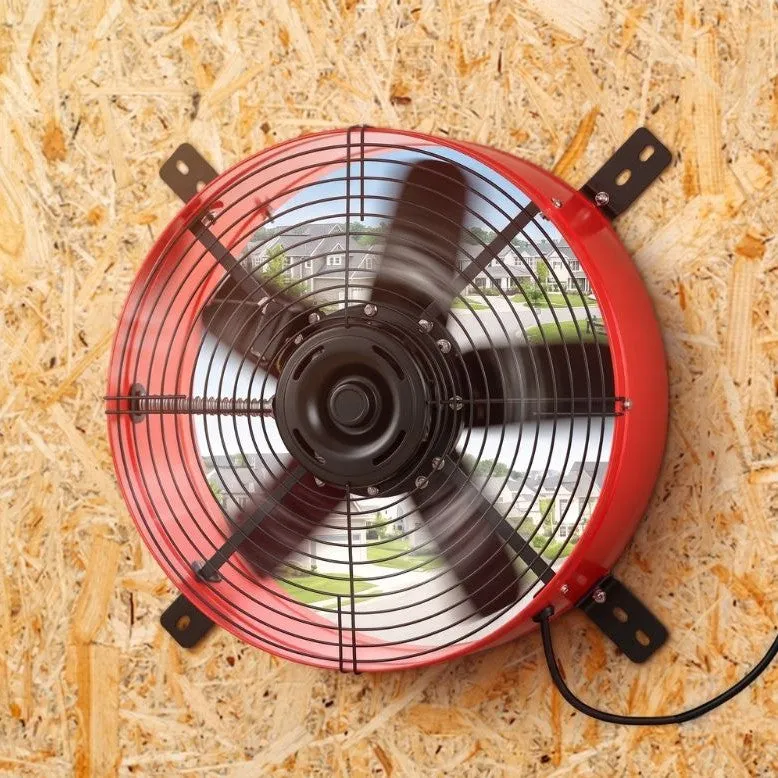
If you’re working with an attic gable fan instead of a roof-mounted model, the process is simpler since you’re cutting into the gable vent rather than through roofing material. Gable installations skip the flashing steps but still require secure framing and weatherproof seals.
For current pricing on either style, check our discount code page before you buy.
Wiring and Electrical Connections
One advantage of a solar-powered unit is that most models require zero household wiring. The integrated solar panel powers the fan motor directly, so you won’t need an electrician or a permit in most jurisdictions.
Typical wiring setup:
- The solar panel connects to the fan motor with a plug-and-play cable (usually pre-attached).
- Some models include a small battery or capacitor to keep the fan running briefly after sunset.
- If your unit has an optional thermostat or humidistat, follow the manufacturer’s diagram to splice those wires between the panel and motor.
Hybrid or AC backup models may include a junction box for connecting to household power when solar isn’t sufficient. If your fan requires AC wiring, hire a licensed electrician or check local codes. Running new circuits through an attic usually requires a permit.
Once everything is connected, test the fan by covering and uncovering the solar panel with your hand. The blades should spin up when the panel sees light and slow or stop when shaded. If nothing happens, double-check all connectors and verify the panel isn’t damaged.
Ventilation Balance and Performance Tips
A single fan won’t cool your attic effectively if you don’t have adequate intake vents. Hot air exits through the fan, but cool air must enter from below to replace it. Without proper intake, the fan works harder and moves less air.
Intake vent requirements:
- Soffit vents, ridge vents, or gable vents provide the intake airflow.
- A good rule of thumb is one square foot of intake for every 300 square feet of attic floor space.
- If you have an older home with minimal soffit vents, consider adding more or installing a second gable vent on the opposite end.
Maximizing solar fan efficiency:
- Keep the solar panel clean. Dust, pollen, and bird droppings cut power output by 20 percent or more.
- Trim back tree branches that cast shadows as the sun moves across the sky.
- In winter, some homeowners cover or disconnect the fan to retain heat. Check your model’s manual for seasonal recommendations.
Compare your roof-mount unit to a gable model in the table below to understand airflow differences:
| Feature | Roof-Mount Solar Fan | Gable-Mount Fan |
|---|---|---|
| Airflow direction | Vertical exhaust through roof | Horizontal through gable end |
| Installation complexity | Requires cutting shingles and flashing | Mounts to existing gable vent |
| Solar panel location | Integrated on fan housing | Same, integrated design |
| Best for | Homes without gable vents | Homes with accessible gable ends |
For help choosing between the two or to grab the current discount, visit the Langy Energy store page.
Maintenance and Troubleshooting
Solar attic fans are low-maintenance, but a quick inspection twice a year keeps them running smoothly.
Routine maintenance checklist:
- Clean the solar panel: Wipe it down with a damp cloth every few months, more often if you live in a dusty area.
- Inspect the flashing: Look for cracks in the roofing cement or lifted shingles after heavy storms. Reapply sealant as needed.
- Check the fan blades: Listen for unusual noise. Squeaking or grinding means the motor bearings may need lubrication or replacement.
- Clear debris: Remove leaves, nests, or other obstructions from the fan screen.
Common issues and fixes:
- Fan won’t start: Verify the solar panel is receiving direct sunlight and all connectors are seated firmly.
- Weak airflow: Check that intake vents aren’t blocked by insulation. Push insulation back from soffit vents if necessary.
- Water intrusion: If you see moisture around the fan base, remove the unit, add more roofing cement under the flashing, and reseal all edges.
Most quality units carry a warranty covering the motor and solar panel for three to five years. Register your product right after installation so you have proof of purchase if you need a replacement part.
Who Should Tackle This Project
This installation suits confident DIYers who are comfortable working on a roof and using power tools. If you’ve replaced shingles, installed a satellite dish, or done similar roof repairs, you already have the skills.
When to hire a professional:
- Your roof pitch is steeper than 8/12 or you don’t have proper fall protection.
- You’re not comfortable cutting into your roof deck.
- Your attic has complex framing, multiple rooflines, or limited access.
- Local codes require a licensed contractor for any roof penetration.
Even if you hire out the install, understanding the process helps you evaluate quotes and catch subpar work. A good installer will seal every edge, check ventilation balance, and test the fan before leaving.
Pair it with the right prep work and you’ll enjoy a cooler attic and lower energy bills all summer long.
Questions
How long does it take to install a solar attic fan?
Most DIYers complete the installation in two to four hours, depending on roof pitch and whether you need to add intake vents. First-timers should budget extra time for careful measuring and sealing.
Do I need an electrician to install a solar attic fan?
No, most solar attic fans are completely self-contained with the panel wired directly to the motor. You only need an electrician if you're adding an AC backup or hybrid model that connects to household power.
Can I install a solar attic fan on a metal roof?
Yes, but you'll need special flashing designed for metal roofing and self-tapping screws with rubber washers. Follow the manufacturer's metal-roof instructions to avoid leaks.
Will one solar attic fan be enough for my whole attic?
It depends on your attic size. A single 20- to 30-watt fan typically covers 1,200 to 1,800 square feet. Larger attics or homes in very hot climates may need two units or a higher-capacity model.
What happens if my solar attic fan stops working in the winter?
Some models are designed to run year-round to prevent moisture buildup, while others can be covered or disconnected in cold months. Check your unit's manual for the manufacturer's seasonal recommendations.
How do I know if I have enough intake vents for my new fan?
Measure your attic floor area and ensure you have at least one square foot of intake vent (soffit or gable) per 300 square feet of space. Without adequate intake, the fan can't pull in fresh air efficiently.
Products in this guide
Shopping at Langy Energy? See the discount code
5% OFF All Orders
More in this series
 How Long Do Bug Zappers Actually Last Before Replacement?20 Aug 20265 min
 UFO High Bay Light Buying Guide: Lumens, Coverage, and Warehouse Use20 Aug 20266 minWhy Is My Attic Gable Fan Not Working? Common Troubleshooting Tips20 Aug 20265 min
 Do Solar Street Lights Last Through Winter? Longevity and Performance20 Aug 20265 minMosquito Zapper vs Bug Zapper: What Is the Difference?20 Aug 20265 min