 A CVLIFE guide
CVLIFE 30mm Scope Rings: Installation and Torque Settings
Proper installation of 30mm scope rings requires correct torque specs, height matching, and alignment to prevent scope damage and maintain zero.
What You Need to Know About Installing 30mm Scope Rings
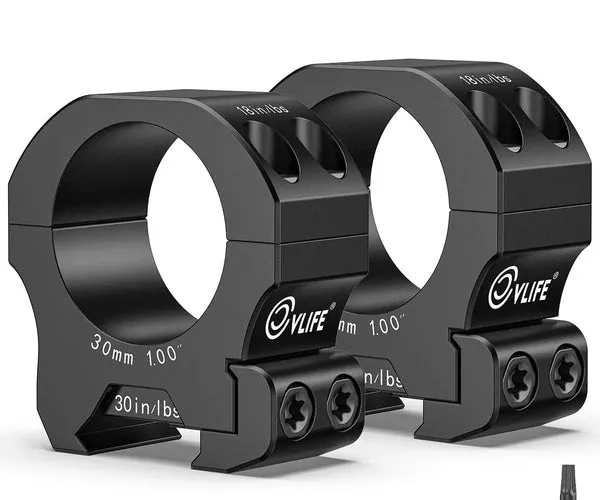
Installing 30mm scope rings correctly means applying the right torque, choosing the proper height, and ensuring perfect alignment before you head to the range. CVLIFE’s 30mm scope rings are designed for common optics like an ar15 scope or lpvo scope, and we’ll walk you through every step to mount them without damaging your glass or losing zero.
Most mounting failures come from over-torquing, misalignment, or choosing the wrong ring height.
Choosing the Right Ring Height for Your Setup
Ring height determines the distance between your rail and the center of your scope tube. Pick too low and your objective bell hits the barrel. Too high and you lose a proper cheek weld.
Low rings (0.9 to 1.0 inch centerline height) work for scopes with small objective lenses, typically under 42mm, on flat-top AR platforms. Medium rings (1.0 to 1.1 inches) suit most ar15 scope configurations with 44 to 50mm objectives. High rings (1.2+ inches) are for large objective lenses or when you need clearance for flip-up iron sights.
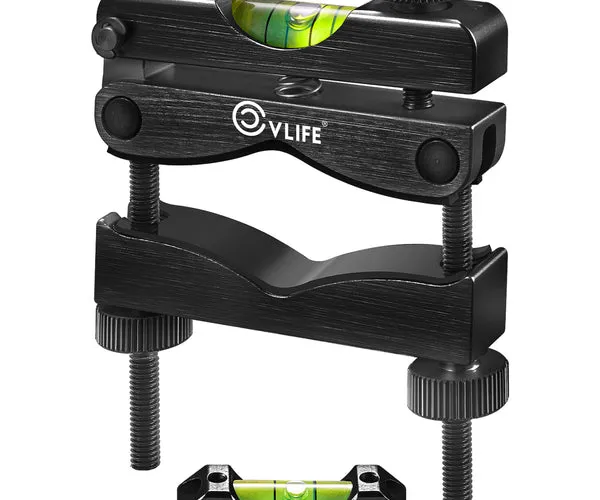
Before you buy, measure from your rail to the bottom of your scope’s objective bell when seated in the rings. Add 0.1 to 0.15 inches of clearance to avoid contact during recoil. If you’re pairing rings with a scope level, factor in that extra hardware thickness.
Check the latest price to see current CVLIFE ring options with our exclusive discount code.
Torque Settings for 30mm Rings
Proper torque prevents scope tube damage and keeps your optic locked in place. Most manufacturers specify 15 to 18 inch-pounds for ring cap screws and 25 to 35 inch-pounds for base or rail screws, but always verify your specific ring’s manual.
Use a quality inch-pound torque wrench (not foot-pounds). Apply torque in a cross-pattern, tightening each screw incrementally to avoid uneven clamping force:
- First pass: snug each screw finger-tight
- Second pass: torque to 50% of the target spec
- Third pass: bring all screws to full spec in a cross pattern
- Final check: re-verify each screw after 10 to 15 rounds
Over-torquing is the most common mistake. Aluminum scope tubes can dimple or deform at 25+ inch-pounds of ring torque, causing internal lens misalignment. If your rings don’t include a torque spec sheet, 15 to 18 inch-pounds is a safe default for the caps and 30 inch-pounds for the base.
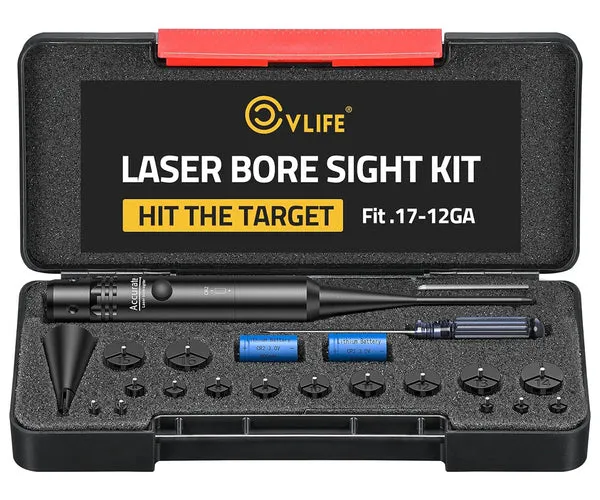
We recommend pairing your mount with a bore sight laser or bore sight kit to speed up your initial zeroing after installation.
Step-by-Step Installation Process
Start with a clean, degreased rail and ring bases. Any oil or debris will cause slippage under recoil.
- Mount the bases to your Picatinny or Weaver rail, aligning the recoil lugs into the rail slots. Torque base screws to 30 to 35 inch-pounds in a cross pattern.
- Seat the scope in the lower ring halves without the caps. Slide it forward or back until the eye relief feels natural when you shoulder the rifle. Most shooters need 3.5 to 4 inches of eye relief.
- Level the reticle by hanging a plumb bob or using a scope level tool downrange. Rotate the scope tube until the vertical crosshair aligns perfectly.
- Install the upper caps loosely, ensuring even gaps on both sides of each ring. The gaps should be equal top and bottom, if not, your rings are misaligned or your scope tube diameter doesn’t match.
- Torque the cap screws in three incremental passes (50%, 75%, 100%) using a cross pattern on each ring. Verify your reticle level hasn’t shifted after final torque.
- Test for slippage by gently trying to rotate the scope in the rings. It should not move.
If you’re mounting an lpvo scope with a heavy objective, consider a third ring or cantilever mount for added support on hard-recoiling rifles.
Alignment and Common Installation Mistakes
Misaligned rings stress your scope tube even if torque is correct. Before you install the scope, remove the top caps and look through both rings from above. You should see two perfect circles. If the rings are canted or offset, you’ll see ovals or misalignment, fix this before mounting.
Lapping rings was once common practice to ensure perfect alignment, but modern quality rings like 30mm scope rings from reputable brands are CNC-machined and rarely need it. Lapping removes protective anodizing and can introduce more problems than it solves unless you have precision equipment.
Avoid these mistakes:
- Using thread-locking compound on first install: mount, test, and confirm zero before applying removable Loctite (blue, not red)
- Mixing ring heights: both rings must be identical height
- Ignoring gap symmetry: uneven gaps mean you’re clamping one side harder than the other
- Skipping the torque wrench: “tight enough” is how scopes get crushed
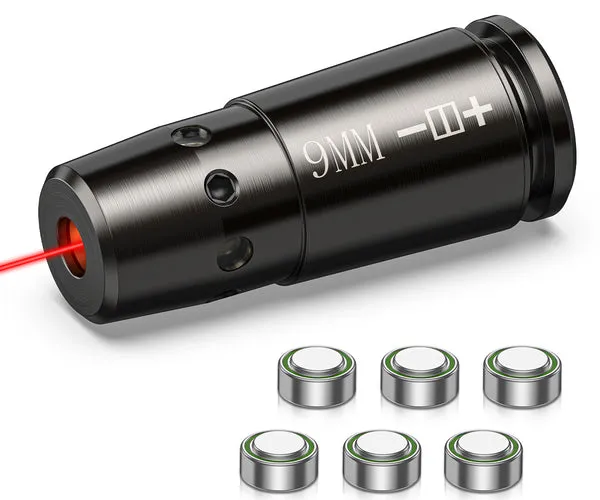
If you’re zeroing at the range, bring a 9mm bore sight or caliber-specific laser to get on paper faster. For current deals on bore sighting tools and rings, grab the code for 10% off sitewide.
Maintenance and Re-Torquing Schedule
Scope ring screws can loosen over time from vibration and recoil. Check torque every 200 to 300 rounds or before important range sessions and hunting trips.
Remove your scope at least once per year to inspect the ring contact patches for galling, corrosion, or uneven wear. Light wear marks are normal, but deep gouges or shiny spots indicate over-torquing or misalignment.
Clean the rail and ring bases with isopropyl alcohol and inspect Picatinny slots for burrs or damage. If you notice poi shift that returns after re-torquing, your rings may be damaged or your rail may be out of spec.
Store your rifle with the scope installed rather than repeatedly removing and reinstalling it. Each reinstall risks slightly different alignment and zero shift. When you do remove the optic, mark the forward position of your scope tube on the rings with a paint pen for quick reinstallation.
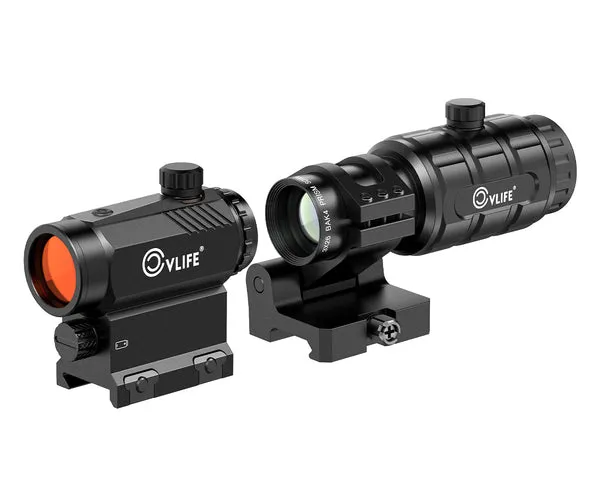
For shooters running multiple optics, consider dedicated ring sets for each scope. Swapping glass between rings introduces alignment variables every time. We’ve found accessories like a red dot offset mount or laser gun trainer can expand your rifle’s capability without disturbing your primary optic’s zero.
Choosing Quality Rings That Match Your Optic
Not all rings are created equal. According to Outdoor Life’s testing, ring quality impacts accuracy and durability as much as the scope itself.
Match your ring material to your use case. Aluminum rings are lightweight and sufficient for most sporting rifles and ARs. Steel rings add weight but provide maximum strength for heavy-recoiling magnums and precision rifles that see hard use.
Look for rings with these features:
- Four cap screws per ring instead of two for better clamping distribution
- Picatinny or Weaver compatibility clearly marked (they’re not always interchangeable)
- Recoil lugs or pins to prevent forward/backward slippage
- Torque specifications included in the package
Brands like Vortex and Warne publish detailed specs and installation guides. CVLIFE rings follow similar design standards at a more accessible price point, making them a practical choice for shooters building or upgrading an AR platform.
Pair your new rings with a bore sight kit to streamline zeroing, and don’t forget to check the latest price with our discount code before ordering.
Questions
What torque setting should I use for 30mm scope ring caps?
Most 30mm rings require 15 to 18 inch-pounds for cap screws and 30 to 35 inch-pounds for base screws. Always check your specific ring manufacturer's torque specification sheet, and use an inch-pound torque wrench with a cross-pattern tightening sequence.
Can I use low rings on an AR15 with a 50mm objective scope?
No, a 50mm objective typically requires medium or high rings to clear the barrel and handguard. Measure the distance from your rail to the objective bell and add 0.1 to 0.15 inches of clearance to choose the correct height.
Do I need to lap CVLIFE 30mm scope rings before installation?
Modern CNC-machined rings rarely require lapping. Check alignment by looking through both empty rings, if you see perfect circles, lapping isn't necessary and can damage protective coatings.
How often should I check scope ring torque?
Re-check torque every 200 to 300 rounds or before important shooting sessions. Vibration and recoil can loosen screws over time, causing zero shift.
Will over-torquing damage my scope tube?
Yes, exceeding 20 to 25 inch-pounds on ring cap screws can dimple or deform aluminum scope tubes, causing internal lens misalignment and accuracy problems. Always use a torque wrench and follow the manufacturer's specifications.
Can I mount a 30mm scope with 1-inch rings?
No, ring diameter must match your scope tube diameter exactly. A 30mm scope requires 30mm rings, using the wrong size will not clamp securely and can damage your optic.
Products in this guide
 Shopping at CVLIFE? See the discount code
10 % OFF Sitewide
Shopping at CVLIFE? See the discount code
10 % OFF Sitewide
More in this series
Complete Guide to Choosing the Right Bore Sight Kit for Your Caliber18 Aug 20266 min Why Won’t My Pistol Laser Hold Zero?18 Aug 20264 min
 Do Brass Catchers Really Work?18 Aug 20265 minLPVO vs Red Dot Sight: Which Optic Is Right for Your AR15?18 Aug 20265 minHow to Zero Your AR15 Scope Using a Bore Sight Laser18 Aug 20265 min