 A EXknight guide
How to Install PS5 Controller Back Paddles Without Damaging Your Controller
Learn how to install ps5 controller back paddles safely without stripped screws, cracked shells, or faulty buttons using our tested step by step guide.
To install PS5 controller back paddles without damage, work on a soft, stable surface with the exact precision screwdriver bit your kit calls for, disconnect the battery before touching any ribbon cable, open the ZIF connector locks instead of pulling cables, and tighten the shell screws only until snug. Most damage comes from the wrong bit, forced ribbons and over tightened screws. If your kit clips on without opening the controller, the risk is lower still. Below we go through both kinds of kit, the steps in order, and the mistakes to avoid.
Two kinds of PS5 controller back paddles
Back paddle kits for the standard DualSense come in two broad designs:
- Clip on attachments fit onto the back of the controller and connect without replacing the shell. They are quicker to fit and easier to remove.
- Replacement shell kits swap the controller’s rear shell for one with buttons built in, joined to the board by a flex ribbon cable. They sit flush but need the controller opened.
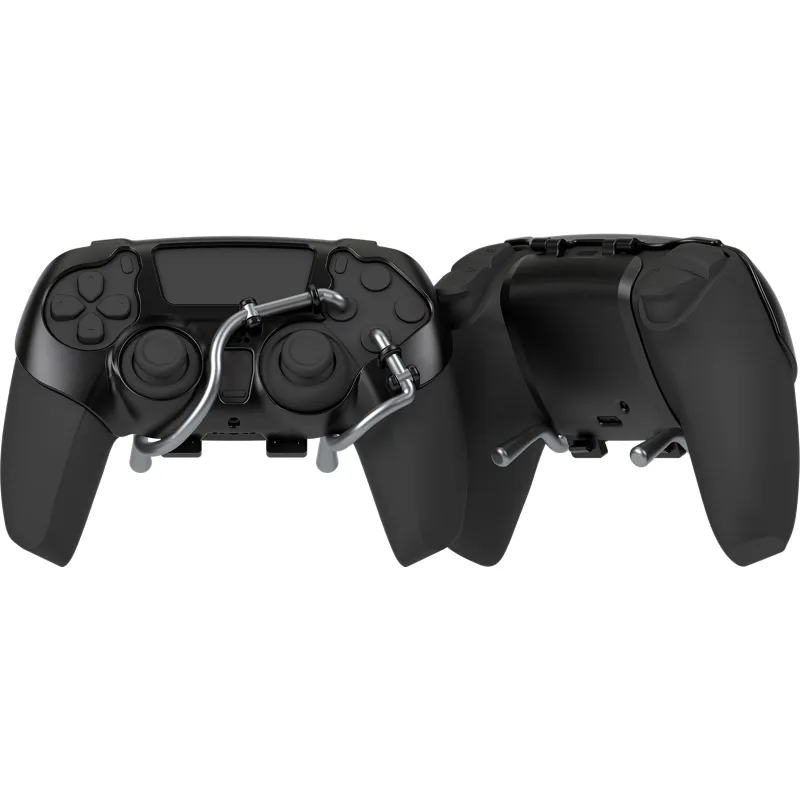
EXknight’s paddle product is the EXknight LeverBack PS5 paddles. Read its listing to see how it attaches, what is in the box and which controller models it supports before you pick up a screwdriver. The DualSense Edge already has its own back buttons and a different layout, so kits made for the standard DualSense are not meant for it.
What comes in a typical shell kit
If you have a replacement shell kit, lay every piece on a clean, well lit surface and check it against the parts list before you open anything. A typical kit includes:
- A rear shell with button contacts already fitted
- The paddles, sometimes in short and long versions for different grips
- A flex cable that connects the new buttons to the controller board
- Small screws for the shell
- A screwdriver and pry tool (basic kits may leave these out)
Some bundles also add trigger modules or spare conductive pads. Keep the instructions from your kit to hand, since they override any general guide, including this one.
Prepare your workspace and tools
A common cause of damage is working on an unstable surface with the wrong screwdriver bit. Use the small precision Phillips or JIS bit your kit names. A bit that is even slightly too large will cam out and strip the plastic screw posts in the shell.
- Work on a microfiber cloth or silicone mat so you do not scratch the controller face
- Use a magnetic mat or a small parts tray for screws, sorted by where they came from
- Keep the flex cable away from static (avoid synthetic carpet, and touch something grounded first)
- Take a photo of the ribbon cable routing before you disconnect anything
Step by step: installing PS5 controller back paddles
Shell kits follow a similar process across brands. The step that varies most is how the ribbon cable is routed, so follow your kit’s diagram there.
1. Remove the rear shell
Flip the controller face down and remove the trim pieces your instructions describe. Remove the four screws on the back with steady, downward pressure. Lift the shell from the bottom edge with a plastic pry tool, gently, since there are cables near the bottom corners.
2. Disconnect the battery and ribbon cables
Lift the battery connector with a plastic spudger. Remove any tape holding the ribbon cables. Flip up the small locking tabs on the ZIF connectors with a fingernail or spudger, then slide the ribbons out. Never pull on the cables themselves.
3. Fit the new shell
Place the new rear shell and route the flex ribbon through its channel. Slide the ribbon into the board connector, press the locking tab down firmly, then reconnect the battery.
4. Attach the paddles and test
Fit the paddles to their pivot points. Screw the shell down, turning only until snug. Power on and press each paddle in the system menu or a game. If a paddle does not register, open the controller again and reseat the ribbon.
Common mistakes that damage the controller
These mistakes come up again and again in installation guides and forum threads such as this PS5 DualSense back button attachment discussion on NeoGAF. Avoiding them keeps your controller working.
- Mixing up screws. Screws of different lengths go in different places. A long screw in a short hole can punch through the front shell.
- Forcing the ribbon cable. ZIF connectors are fragile. If the ribbon does not slide in easily, check its orientation rather than pushing harder.
- Skipping the tape or foam pads. Without them, the ribbon can shift and cause paddles that only work some of the time.
- Over tightening. The screws go into plastic. Tighten by hand, never with a powered driver.
- Leaving the battery connected. Working on ribbons with power connected risks a short.
Testing and mapping your paddles
Once fitted, the paddles need a job. Many kits copy an existing face button by default. To change that, most use an onboard programming mode, and some use an app. A typical onboard sequence looks like this, but the exact buttons differ by kit:
- Hold the programming button until the LED blinks
- Press the paddle you want to assign
- Press the button you want that paddle to copy
- Wait for the LED to confirm
- Repeat for each paddle
Check the listing for which buttons a paddle can copy. Some kits only map face buttons, while others also cover L3, R3 and more.
Paddle kit or a controller with paddles built in
| You are | Better fit |
|---|---|
| Comfortable opening electronics | A replacement shell kit |
| Unwilling to open your controller | A clip on attachment |
| Buying a new controller anyway | A controller with back buttons already fitted |
| Worried about your warranty | A clip on attachment, or a controller with built in paddles |
Opening the controller can affect Sony’s warranty, so read the terms before you start. If you want to compare paddle styles, EXknight’s LeverBack paddle attachment listing is the place to start.
Caring for your paddles
Wipe the paddle contact points with a dry cotton swab now and then to clear dust and skin oils. Keep drinks away, since sticky spills can gum up the switches. Store the controller where nothing presses on the paddles. If a paddle turns mushy over time, check whether your kit’s switches can be replaced without soldering.
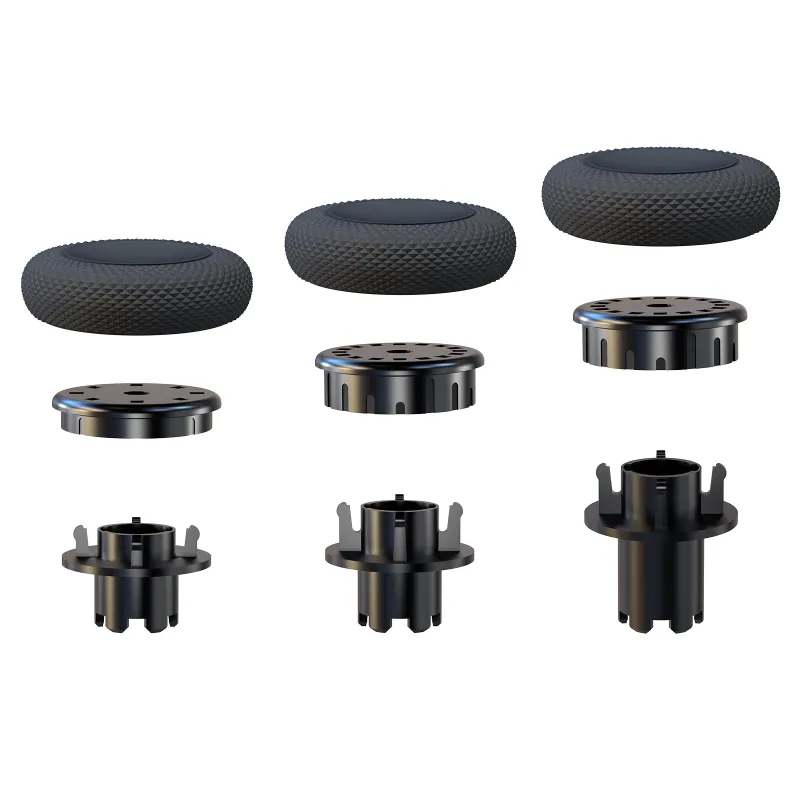
If you also own a DualSense Edge, EXknight sells height adjustable thumbsticks for the DualSense Edge. Before you order, see the current EXknight discount code.
Questions
Will installing PS5 controller back paddles void my warranty?
It can. Opening the controller and replacing the rear shell may affect Sony's warranty, so read the terms first. A clip on attachment avoids opening the controller.
Do I need to solder anything for a PS5 paddle attachment?
Most current kits connect with ribbon cables and ZIF connectors or clip on, with no soldering. Check your kit's instructions to be sure.
Can I use a back paddle kit on a DualSense Edge?
Kits made for the standard DualSense are not meant for the Edge, which already has back buttons and a different layout. Check the supported models on the listing.
How long do the switches on back paddle kits last?
It depends on the switch quality and how much you play. Look for the switch rating on the listing, and check whether the kit allows switches to be replaced.
Can I remap paddles to L3, R3 or touchpad clicks?
That depends on the kit. Many paddles can only copy face buttons, while others cover more inputs. The product page should say which buttons are supported.
Products in this guide
Shopping at EXknight? See the discount code
5% OFF All Orders
More in this series
Is a Pro PS5 Controller with Paddles Worth the Upgrade Over Standard Add-Ons?7 Sep 20265 min MagSafe Keyboard vs. Flip Phone Keyboard Case: Which Mobile Typing Solution Fits Your Setup?7 Sep 20265 minWhy Your PS5 Paddle Attachment Isn’t Registering and How to Fix It7 Sep 20264 minHow to Clean and Maintain Your Samsung Z Flip Keyboard Case for Long-Term Use7 Sep 20265 minKontrol Freek Thumbsticks vs Back Paddles: Which Upgrade Helps Your Aim More?7 Sep 20263 min