 A Baleine Shop guide
How to Keep Your Cooler Bag Cold Longer: Ice Packs vs Frozen Bottles
Cooler bags stay cold longest when you pre-chill them, use a 2:1 ice-to-contents ratio, and choose the right cooling method for your trip length.
Cooler bags keep your food and drinks cold by trapping cool air inside insulated walls, but the right cooling method makes the difference between lunch that stays fresh for four hours and snacks that warm up by noon.
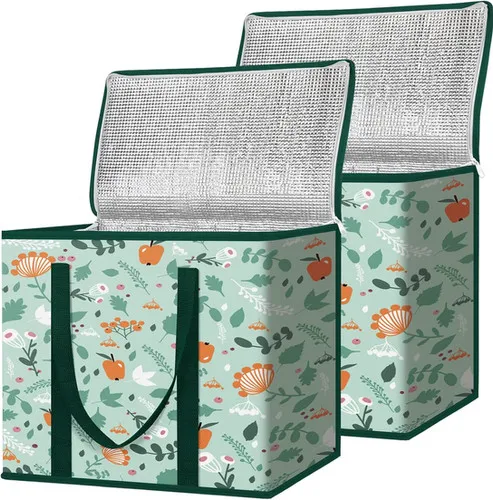
Whether you own a compact lunch cooler bags or an extra large insulated cooler bag for tailgating, these strategies will extend your cold time and protect your perishables.
Ice Packs vs Frozen Bottles: Which Keeps Cooler Bags Colder?
Both ice packs and frozen bottles work, but each has trade-offs depending on your trip length and space constraints.
Ice packs deliver consistent, long-lasting cold because they are designed to stay frozen longer than plain water. Reusable gel packs and rigid ice blocks typically hold their temperature for six to ten hours in a well-insulated bag. They do not leak as they thaw, and flat packs fit neatly against the sides and top of your cooler bags to maximize contact with food.
Frozen water bottles are free, widely available, and double as drinking water once they melt. A standard 16-ounce bottle stays frozen for four to six hours in moderate heat. The downside: round bottles leave air gaps, and once the ice melts you are left with lukewarm water taking up valuable space. They work best for half-day outings or as a supplement to ice packs.
Our recommendation: use ice packs for trips longer than four hours, or combine both by placing frozen bottles at the bottom and flat ice packs on top to sandwich your contents in cold.
| Method | Cold Duration | Pros | Cons |
|---|---|---|---|
| Reusable gel ice packs | 6-10 hours | No leak, flat shape, reusable | Requires freezer space |
| Frozen water bottles | 4-6 hours | Free, drinkable, easy to find | Air gaps, shorter cold time |
| Block ice (solid) | 12+ hours | Melts slowest | Takes up space, can leak |
Pre-Chill Your Cooler Bag and Contents Before Packing
The single biggest mistake we see is loading warm food into a room-temperature bag and expecting the ice to do all the work. Insulated cooler bags are designed to *maintain* cold, not create it, so starting cold is essential.
Pre-chill your bag by placing ice packs or a bag of ice inside for 30 to 60 minutes before you pack. This drops the interior temperature and reduces the thermal load on your cooling method.
Chill your food and drinks overnight in the refrigerator. A cold soda pulled from the fridge at 38°F will stay cold for hours longer than a pantry-temp can that must be cooled down from 70°F. For best results:
- Freeze water bottles, juice boxes, or pouches solid the night before
- Store perishable items in the coldest part of your fridge
- If you are packing leftovers, cool them in the fridge first rather than placing warm containers directly into the bag
This simple prep step can extend your cold time by two to four hours, especially in the best cooler bags with thick foam insulation.
Pack Strategically: Ice-to-Contents Ratio and Layer Order
How you arrange items inside your bag directly affects how long everything stays cold. Follow these packing principles:
Use a 2:1 ice-to-contents ratio for all-day cold. That means one-third of your cooler volume should be ice packs or frozen bottles, and two-thirds food and drinks. If you are only out for a few hours, you can reduce to 1:1.
Layer cold sources at the bottom, top, and sides. Cold air sinks, so place your heaviest ice packs or frozen bottles on the bottom, nestle food in the middle, and lay a flat ice pack across the top. This creates a cold envelope around your contents.
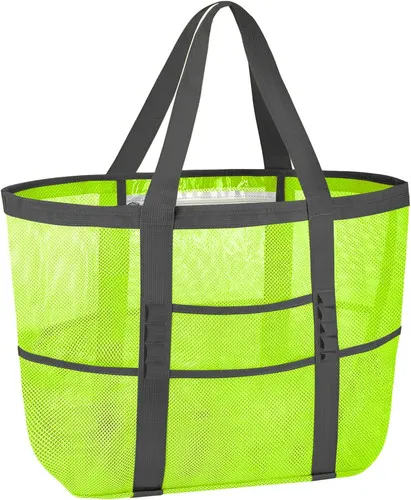
Limit air space by packing tightly. Empty air warms up quickly, so fill gaps with extra ice packs, frozen bottles, or even a rolled-up beach mesh bag if you need flexible filler.
Separate raw and ready-to-eat foods using reusable dividers or storage bags to prevent cross-contamination. If your trip involves raw meat, double-bag it and place it at the very bottom where it is coldest and cannot drip onto other items.
For extended trips or hot weather, check our discount code to save on extra insulated options.
Keep Your Cooler Bag Closed and Out of the Sun
Every time you open the lid, warm air rushes in and cold air escapes. If you are feeding a crowd or have kids who want snacks every 20 minutes, consider packing a second smaller cooler for frequently accessed drinks so your main food cooler stays sealed.
Minimize openings by organizing items so you can grab what you need quickly. Place lunch items on top, snacks in one corner, and drinks in another.
Store your bag in the shade whenever possible. Direct sunlight heats up even the best insulated cooler bags. If you are at the beach or a park, tuck your cooler under a blanket, umbrella, or in the shade of a tree. In the car, keep it in the cabin rather than the trunk, where temperatures can climb 20 to 30 degrees higher.
Use a light-colored bag if you have the choice. Dark colors absorb more heat, while white or silver bags reflect sunlight and stay cooler longer.
Boost Performance with These Extra Tricks
Once you have mastered the basics, these advanced tactics can squeeze out a few extra hours of cold:
- Add salt to ice if you need to chill drinks fast. A saltwater slush drops below 32°F and cools bottles in minutes, though it melts faster than plain ice
- Wrap your cooler in a towel or blanket for an extra layer of insulation, especially if your bag is older or a cheaper insulated cooler bag with thin walls
- Freeze individual portions like sandwiches or fruit ahead of time. They act as bonus ice packs and thaw to perfect eating temperature by lunch
- Pre-freeze gel packs for 24 to 48 hours to ensure they are rock-solid. A half-frozen pack loses effectiveness quickly
- Drain melted water if your trip is multi-day. Standing water is warmer than ice and accelerates melting, so pour it out and add fresh ice if possible
For more ways to save on quality gear, grab the latest code before your next outing.
Choosing the Right Cooler Bag for Your Needs
Not all cooler bags are created equal. Wall thickness, zipper quality, and closure design all affect how long your contents stay cold.
Look for closed-cell foam insulation at least half an inch thick. Cheaper bags use thin open-cell foam that compresses easily and loses efficiency. Premium insulated cooler bags often feature one-inch walls or more.
Check the closure system. A tight zipper with a fold-over flap or magnetic strip seals better than a basic zipper alone. Leaky closures let warm air in.
Consider size and portability. A compact lunch cooler is easier to pre-chill and fits less air, so it often outperforms an oversized bag that is only half full. For family trips, an extra large insulated cooler bag makes sense, but for solo outings a smaller option keeps things colder with less ice.
Hard-sided vs soft-sided: soft bags are lighter and easier to store, but hard-sided coolers with thick walls and gasket seals deliver the longest cold retention. Soft cooler bags are ideal for day trips, while hard coolers win for multi-day camping.
When you are ready to upgrade, check the latest price on our cooler options to find the best fit for your budget and trip style.
Maintenance: Clean and Dry Your Bag After Every Use
Proper care extends the life of your cooler and prevents odors or mold that degrade insulation performance.
Wipe down the interior with warm soapy water or a mild bleach solution after every trip, especially if you carried raw meat or dairy. Pay attention to seams and corners where moisture collects.
Air-dry completely before storing. Trapped moisture breeds mildew and can break down foam insulation over time. Leave the bag unzipped in a well-ventilated area for at least a few hours.
Store with the lid open or unzipped to allow airflow and prevent musty smells. Keep your cooler in a cool, dry place rather than a hot garage or damp basement.
With the right cooling method, smart packing, and a quality insulated bag, you can keep food safe and drinks icy from morning until evening. Whether you choose ice packs, frozen bottles, or a combination, the key is starting cold, staying sealed, and keeping your cooler out of the heat.
Questions
How long do cooler bags stay cold with ice packs?
A well-insulated cooler bag with reusable gel ice packs typically stays cold for six to ten hours, depending on outside temperature, how often you open it, and whether you pre-chill the bag and contents. Thick-walled bags and minimal air space extend cold time.
Are frozen water bottles better than ice packs for coolers?
Frozen water bottles work well for trips under six hours and double as drinking water, but reusable ice packs stay frozen longer and fit more efficiently. For all-day cold, ice packs are the better choice, though many people use both together.
Should I drain water from melted ice in my cooler bag?
Yes, if your trip lasts more than one day. Standing meltwater is warmer than ice and speeds up further melting. Drain it and add fresh ice or frozen packs to restore cold retention.
Can I put my cooler bag in the freezer to pre-chill it?
You can, but it is usually unnecessary and takes up freezer space. Placing ice packs inside the bag for 30 to 60 minutes before packing is enough to drop the interior temperature and improve performance.
How much ice do I need for a cooler bag to stay cold all day?
Aim for a 2:1 ice-to-contents ratio for all-day cold. That means about one-third of your cooler volume should be ice packs or frozen bottles, with the remaining two-thirds filled with food and drinks.
Do insulated cooler bags work without ice?
Insulated bags slow temperature change but cannot keep food cold for more than an hour or two without ice or frozen packs. They work best when paired with a cold source and pre-chilled contents.
Products in this guide
Shopping at Baleine Shop? See the discount code
10% OFF All Orders