 A Mmomotorsport guide
How to Install an E82 Front Lip Without Damaging Your Bumper
Installing an e82 aero performance bumper lip transforms your BMW's look, and with the right prep and technique you can mount it without damaging your bumper.
Installing an e82 aero performance bumper lip transforms your BMW’s look, and with the right prep and technique you can mount it without damaging your bumper.
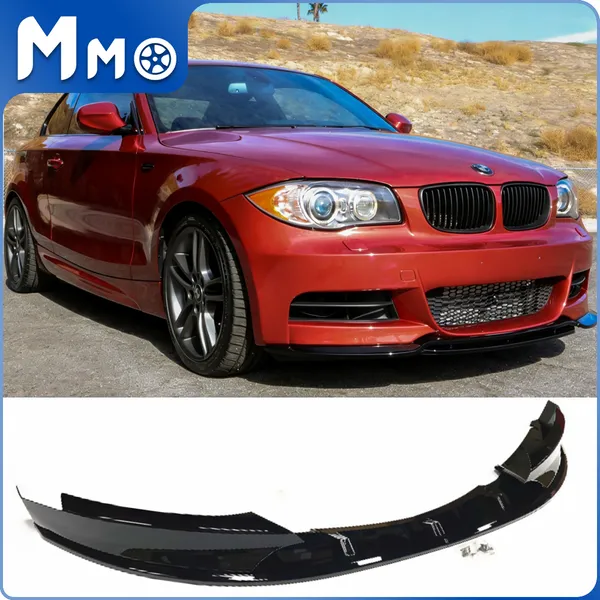
Whether you’re mounting an e82 aero performance bumper lip or exploring e82 front lip options, the process is similar but the prep work makes all the difference.
Tools and Materials You Need for E82 Aero Performance Bumper Lip Installation
Before you start, gather everything in one place. Missing a tool halfway through means leaving adhesive exposed or risking misalignment.
- Isopropyl alcohol (90% or higher) and microfiber cloths
- Painter’s tape or masking tape (3M blue tape works well)
- Heat gun or hair dryer
- Drill with small bits if your lip uses self-tapping screws
- Socket set or wrench for undertray bolts
- Jack and jack stands (for better access)
- Measuring tape and level
- Primer pen or adhesion promoter (if using 3M tape)
- 3M VHB tape or the mounting hardware included with your kit
Most e82 aero kit lip packages include mounting tabs, screws, or pre-applied adhesive backing. Check your kit before you buy additional supplies, and grab the code to save on your order.
Preparing Your Bumper Surface Without Scratching the Paint
Surface prep is where most installs go wrong. Dirt, wax, or old sealant under the lip will cause it to peel or shift within weeks.
Start by washing the entire lower bumper section with car soap, then dry it completely. Next, use isopropyl alcohol on a clean microfiber cloth to wipe down every inch where the lip will contact the bumper. This removes wax, polish, and oils that block adhesive bonding.
If your bumper has a clear bra or paint protection film, the lip can still mount over it, but you’ll need adhesion promoter on the film surface. For bare paint, alcohol prep is enough.
Jack up the front of the car and secure it on jack stands so you can comfortably reach the underside of the bumper. Remove any undertray panels or splash guards that block access to the mounting points. On the E82, you’ll typically remove two or three plastic clips per side.
Dry-Fitting and Marking the E82 Front Lip Position
Never commit to adhesive or screws until you’ve confirmed the lip sits flush and centered. Hold the e82 aero bumper against the bumper and check the gaps on both sides. The lip should follow the bumper’s contour evenly, with no large gaps or pinch points.
Use painter’s tape to mark the top edge of the lip on your bumper. This gives you a reference line when you apply adhesive or drill pilot holes. For lips with side mounting tabs, mark those locations too.
Walk around the car and view the lip from multiple angles. If one side sits higher, adjust your tape marks. The BMW Performance Aero Kit Pictures thread shows factory fitment examples that help you judge correct positioning.
Once you’re satisfied, mark screw or tab locations with a fine-tip marker or small pieces of tape. If your kit uses self-tapping screws into the bumper, mark those spots carefully; a misplaced hole is permanent.
Mounting the Lip: Adhesive, Hardware, or Both
Most quality front lips use a combination of adhesive tape and mechanical fasteners. Tape alone can fail in high heat or winter cold, while screws alone stress the mounting points.
Adhesive method: Apply 3M VHB tape to the back of the lip along the entire top edge and any vertical contact surfaces. Leave the red liner on. Pre-fit the lip one more time to confirm your tape placement won’t block screw holes. Peel the liner, warm the tape with a heat gun for 10 seconds to activate the adhesive, then press the lip firmly into place along your marked lines. Hold pressure for 30 seconds on each section.
Screw or tab method: For lips with mounting tabs that tuck behind the bumper, slide the tabs into position and use the supplied screws or zip-ties to secure them to the bumper brackets or undertray mounts. If your lip requires drilling into the bumper, use a small pilot bit (1/8″ or 3mm) and drill slowly to avoid cracking the plastic. Insert self-tapping screws and snug them down, but don’t overtighten or you’ll strip the plastic.
Combined approach (recommended): Run a continuous bead of tape along the top contact edge, then add screws or tabs every 8 to 12 inches for mechanical support. This distributes load and keeps the lip secure even if the tape softens in summer heat. Many enthusiasts also use small zip-ties through the undertray for extra peace of mind.
Check the latest e82 front lip options and compare mounting systems. Some kits include metal brackets that bolt to existing undertray holes, which we prefer over drilling into the bumper itself.
Post-Installation Care and Common Fitment Issues
After mounting, let the adhesive cure for 24 hours before driving at highway speeds or washing the car. Park indoors or in shade if possible; direct sunlight can soften fresh adhesive and cause sagging.
Common issues and fixes:
- Gap on one side: Loosen screws, press the lip into position, and re-tighten. Add an extra piece of tape or shim behind the lip to fill small gaps.
- Lip droops in the center: Add a screw or zip-tie at the midpoint. Long lips need at least three mounting points across the width.
- Rattling or vibration: Check that all screws are snug and that the lip isn’t rubbing against the undertray. Add a rubber grommet or foam tape where metal contacts the lip.
- Paint damage during install: If you scratched the bumper, clean the area with alcohol, apply touch-up paint, and let it cure before mounting the lip over it.
For more detailed photos and install logs, the BMW Aero & Body for BMW 1 Series E82 (2008-2013) catalog includes OEM and aftermarket lip comparisons that show proper fitment.
Choosing the Right E82 Front Lip for Your Build
Not every lip fits every bumper variant. The E82 came with standard, M Sport, and aftermarket bumpers, and each has slightly different contours.
| Lip Type | Best For | Mounting Style |
|---|---|---|
| OEM-style replica | Stock or M Sport bumpers | Tabs and adhesive |
| Carbon fiber | Track or show builds | Screws and VHB tape |
| Polyurethane flex | Daily drivers, low clearance | Adhesive and zip-ties |
Carbon fiber lips look sharp but crack on impact. Polyurethane flexes over curbs and speed bumps, which makes it more forgiving for street use. We recommend the e82 aero kit lip for a balance of durability and aggressive styling.
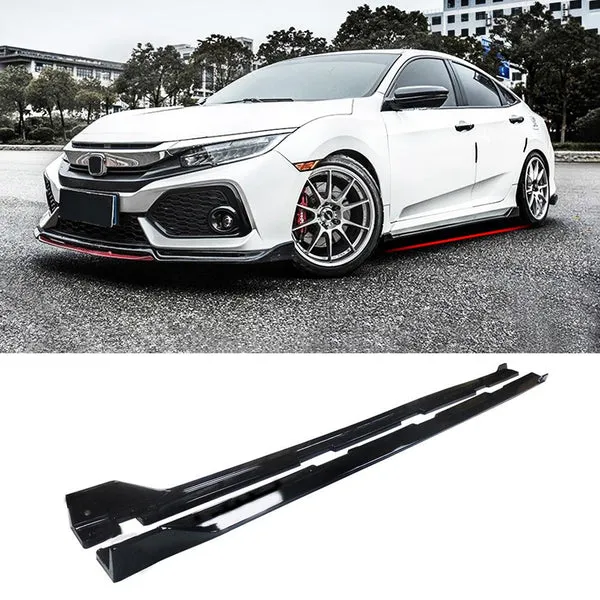
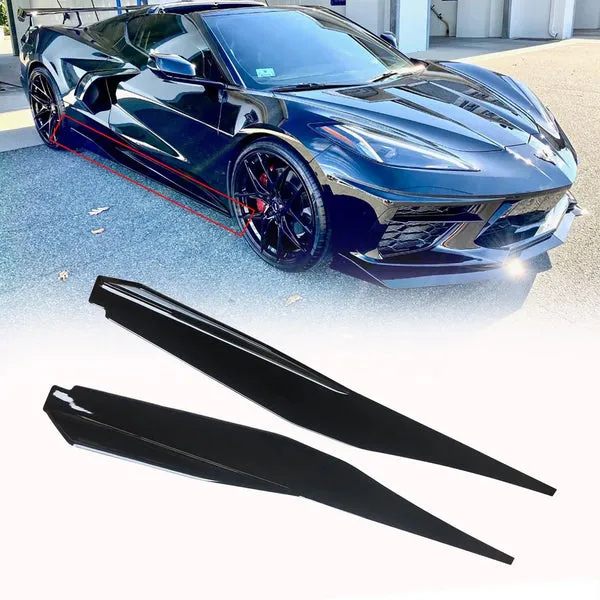
If you’re also adding side skirts or a rear diffuser, plan your install order. Mount the front lip first, then the skirts, so the transitions line up cleanly. The same prep and adhesive techniques apply to honda civic side skirts or c8 side skirts if you work on other platforms.
Check the latest price and see what’s in stock before you order. Many kits ship with incomplete hardware, so confirm mounting tabs and screws are included.
When to Consider Professional Installation
If your bumper has existing damage, deep scratches, or misaligned clips, a body shop can prep the surface and ensure the lip mounts straight. Professional install typically costs $150 to $300, but it’s worth it if you’re mounting an expensive carbon fiber piece or if your bumper needs paint correction first.
DIY installation saves money and gives you full control over the process. With patience and the right prep, you’ll get a result that rivals a shop install. Just take your time on the dry fit, double-check your measurements, and don’t rush the adhesive cure.
The RW Carbon BMW E82 E88 Carbon Fiber Front Lip Spoiler install guide includes torque specs and paint-safe tips if you want a second reference.
Once your lip is installed, step back and enjoy the transformation. The lower, more aggressive front end changes the entire character of the car, and you did it without a single scratch.
Questions
Can I install an e82 aero performance bumper lip without drilling into my bumper?
Yes, many kits use a combination of 3M VHB tape and mounting tabs that clip behind the bumper or attach to existing undertray bolts. This avoids drilling holes in the bumper itself while still providing secure fitment.
How long does the adhesive need to cure before I can drive my car?
Wait at least 24 hours for the adhesive to fully cure before highway driving or car washes. During this time, keep the car parked in moderate temperatures and avoid direct sunlight, which can soften the tape.
Will a front lip scrape on driveways and speed bumps?
Most front lips reduce ground clearance by 1 to 2 inches, so you'll need to approach steep driveways at an angle. Polyurethane lips flex and absorb minor scrapes better than rigid carbon fiber, making them more practical for daily driving.
What should I do if my front lip starts sagging on one side after installation?
Loosen any screws, press the lip back into position, and add an extra mounting point or piece of VHB tape at the sagging section. Long lips often need at least three or four attachment points across the width to prevent drooping.
Do I need to remove my bumper to install an E82 front lip?
No, most front lips install with the bumper on the car. You'll just need to jack up the front and remove the undertray splash guards for access to the mounting points and rear tabs.
Can I reuse the adhesive tape if I need to reposition the lip?
No, once you press 3M VHB tape into place, it bonds permanently and loses its adhesive strength if removed. Always dry-fit first and mark your alignment before peeling the tape liner.
Products in this guide
 Shopping at Mmomotorsport? See the discount code
5% OFF All Orders
Shopping at Mmomotorsport? See the discount code
5% OFF All Orders
More in this series
 MK8 GTI Spoiler Installation: What You Need to Know Before You Buy5 Aug 20265 minDo Honda Civic Side Skirts Improve Handling or Just Looks?5 Aug 20264 min
 Best Spoiler Options for 2023 Toyota Corolla: Function and Style Compared5 Aug 20265 min
 Will a Mustang GT Spoiler Fit All Mustang Years?5 Aug 20264 minC8 Corvette Wing vs Side Skirts: Which Aero Mod Makes the Biggest Difference?5 Aug 20264 min