 A Tesstudio guide
How to Install a Starlink Mini Tripod for Optimal Signal
Installing a starlink mini tripod correctly ensures stable satellite connectivity and optimal signal strength wherever you set up your internet.
A starlink mini tripod provides the stable base your Starlink Mini needs to maintain a clear line of sight to satellites and deliver consistent internet speeds. Proper installation takes less than ten minutes and dramatically improves signal reliability compared to placing the dish on uneven ground.
Whether you’re setting up at a campsite, tailgating, or working remotely from your vehicle, the right tripod setup makes all the difference. This guide walks you through selecting the best tripod for starlink mini, assembling it correctly, and positioning your dish to avoid obstructions.
Why a Tripod Mount Improves Starlink Mini Performance
The Starlink Mini dish relies on a stable, level platform to track satellites accurately. When placed directly on dirt, gravel, or uneven surfaces, the dish can tilt or shift, causing signal drops and slower speeds. A tripod solves three critical problems:
- Stability in wind: Weighted legs prevent tipping and dish movement during gusts
- Precise leveling: Adjustable legs let you fine-tune the angle on slopes or uneven terrain
- Elevation: Raising the dish 12 to 24 inches clears low obstructions like bushes, rocks, and vehicle bumpers
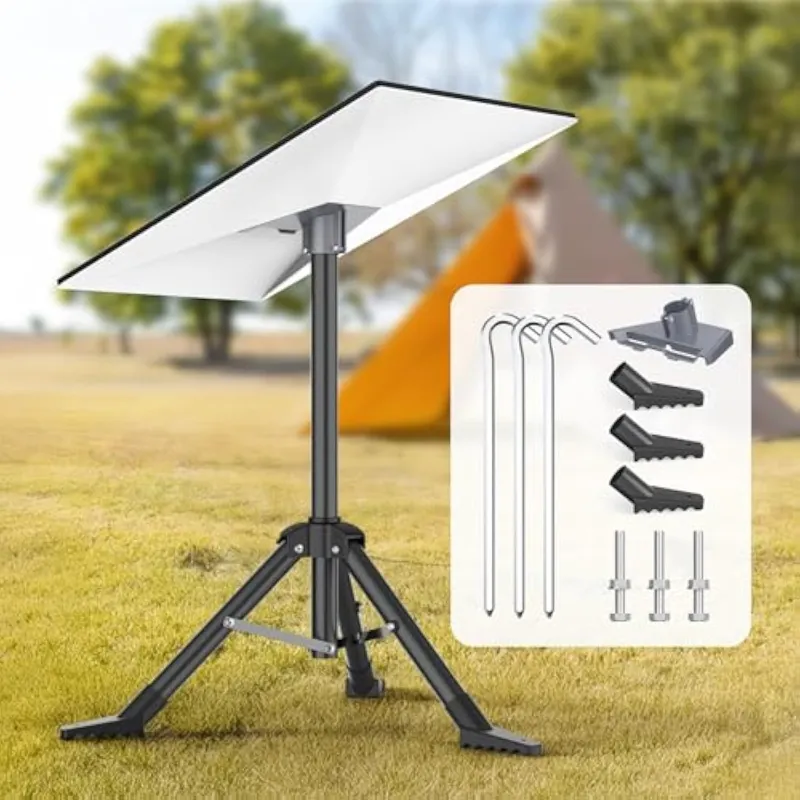
We recommend a starlink mini tripod designed specifically for the Mini’s kickstand mount. Generic camera tripods often lack the weight capacity or adapter compatibility for a 5-pound dish plus cable strain. Purpose-built options typically include a threaded adapter that locks into the dish’s built-in mount without tools.
For users who also travel with roof-mounted gear, pairing your tripod with a starlink stand gives you flexible indoor and outdoor setup options. The stand works well inside RVs or hotel rooms, while the tripod handles outdoor deployments.
Step-by-Step Tripod Installation
Setting up your starlink mini tripod mount is straightforward once you understand the sequence. Follow these steps for a secure, signal-optimized installation.
1. Unpack and Inspect Components
Lay out the tripod legs, center hub, dish adapter, and any included stakes or sandbags. Check that threaded connections are clean and that locking collars turn smoothly. Most tripods ship with a 1/4-inch or 3/8-inch threaded post that matches the Starlink Mini’s kickstand socket.
2. Assemble the Tripod Base
Extend each leg to equal length and lock the collars. For soft ground like sand or grass, extend legs fully for maximum footprint. On hard surfaces like concrete or rock, shorter legs reduce wind leverage. Adjust each leg until a bubble level (or smartphone level app) shows the top plate is flat.
3. Attach the Dish Adapter
Thread the adapter into the Starlink Mini’s kickstand mount socket. Hand-tighten until snug, over-torquing can strip the plastic threads. The dish should sit upright with the cable port facing your power source. If the adapter includes a ball head, leave it loose for now.
4. Mount the Dish to the Tripod
Align the adapter’s base with the tripod’s top plate and thread it onto the center post. Tighten the locking ring until the dish feels secure but can still rotate. Position the dish so the cable runs toward your router or power bank without sharp bends.
5. Level and Lock
Use the Starlink app’s obstruction viewer to confirm a clear field of view. Adjust the dish tilt (most tripods allow 15 to 45 degrees) and rotate the base to avoid trees, buildings, or overhangs. Once positioned, tighten all locking collars and give the dish a gentle shake to verify stability.
Choosing a tripod for your Starlink can be tricky if you’re new to portable satellite setups, but following manufacturer torque specs prevents damage and ensures longevity.
Positioning for Maximum Signal Strength
Even a perfectly assembled tripod won’t deliver fast speeds if obstructions block satellite visibility. Starlink requires a wide cone of clear sky, typically 100 degrees from horizon to horizon.
Finding the Right Spot
Open the Starlink app and tap “Check for Obstructions.” Slowly pan your phone across the sky where you plan to place the dish. Red areas indicate blockages; blue or clear areas are ideal. Move the tripod 10 to 20 feet if nearby objects intrude into the cone.
Common Obstruction Mistakes
- Parking under trees: Even thin branches cause intermittent dropouts
- Too close to buildings: Walls and rooflines block low-angle satellites
- Vehicle shadows: Your car or RV can obstruct signals if the dish is mounted too close
We’ve found that elevating the dish just 18 inches on a tripod clears most ground-level obstacles. For users who need extra height, stacking the tripod on a flat rock or wooden platform works, but always verify stability before leaving the setup unattended.
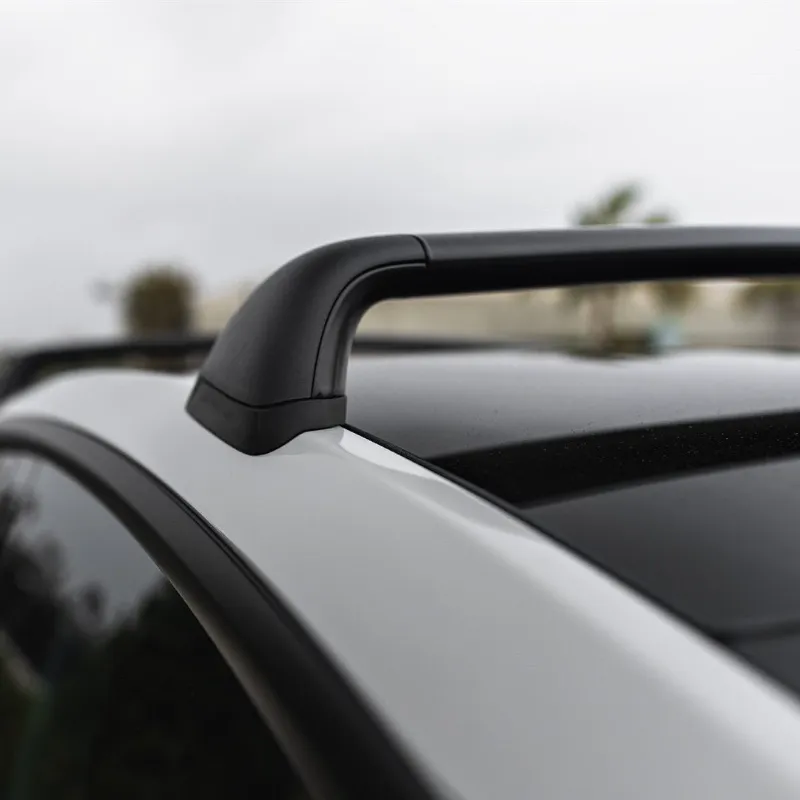
If you’re mounting Starlink near your vehicle, consider pairing your setup with a tesla model y roof rack or tesla model 3 roof rack for semi-permanent installations during extended trips.
Stabilizing the Tripod in Wind and Weather
Lightweight tripods (under 3 pounds) require ballast in anything above a light breeze. Here’s how to keep your dish anchored:
- Sandbags: Drape 5 to 10 pounds over the center hub or hang from the tripod’s lower brace
- Stakes: Drive through leg loops on soft ground; use rock anchors on hard surfaces
- Guy lines: Tie paracord from each leg to nearby anchors if winds exceed 20 mph
For overnight or multi-day deployments, check tension on guy lines daily, as ground shifts and temperature changes can loosen knots.
Starlink Mini tripod reviews consistently highlight wind resistance as a make-or-break feature, so don’t skip ballast even if conditions seem calm.
Comparing Tripod Options
Not all tripods handle the Starlink Mini’s weight and dimensions equally. We evaluated options based on stability, portability, and compatibility.
| Feature | Dedicated Starlink Tripod | Generic Camera Tripod | DIY PVC Stand |
|---|---|---|---|
| Weight capacity | 10 to 15 lbs | 5 to 8 lbs | Varies |
| Adapter included | Yes (threaded) | No (requires purchase) | DIY fabrication |
| Setup time | 3 to 5 minutes | 5 to 10 minutes | 10 to 15 minutes |
| Portability | Folds to 18 to 24 inches | Folds to 12 to 18 inches | Bulky, not collapsible |
A dedicated tripod for starlink gen 3 (the Mini’s hardware generation) eliminates guesswork and ships with the correct adapter thread pitch. Generic tripods require a separate 1/4-20 to 3/8-16 adapter, which adds another potential failure point.
For current pricing on tested tripods, check the latest offers where we share our exclusive discount code for 25% off.
Maintenance and Storage Tips
Proper care extends your tripod’s lifespan and prevents field failures. After each use:
- Rinse legs if exposed to saltwater, mud, or sand, grit damages locking collars
- Dry thoroughly before folding to prevent corrosion on aluminum or steel parts
- Store loose in a ventilated bag rather than cinching straps tight, which can bend legs over time
Inspect threaded connections every few months for wear. If the dish adapter spins freely or wobbles, replace it before your next trip. Most manufacturers sell replacement adapters separately.
Keep a small tube of threadlocker (blue, not red) in your kit for emergency repairs. A drop on the adapter threads prevents loosening from vibration during transport.
Who Should Use a Tripod vs. Other Mounts
A tripod excels for temporary setups where you move locations every few days. If you’re camping, attending outdoor events, or working from different remote sites, the portability and quick setup justify the investment.
Skip the tripod if:
- You have a permanent roof or pole mount already installed
- You operate exclusively indoors where a starlink stand provides cleaner cable routing
- Your site has a flat concrete pad where the dish’s kickstand is stable on its own
Choose a tripod if:
- You set up on dirt, gravel, sand, or grass regularly
- Wind or foot traffic could knock over an unsupported dish
- You need to adjust position frequently to clear obstructions
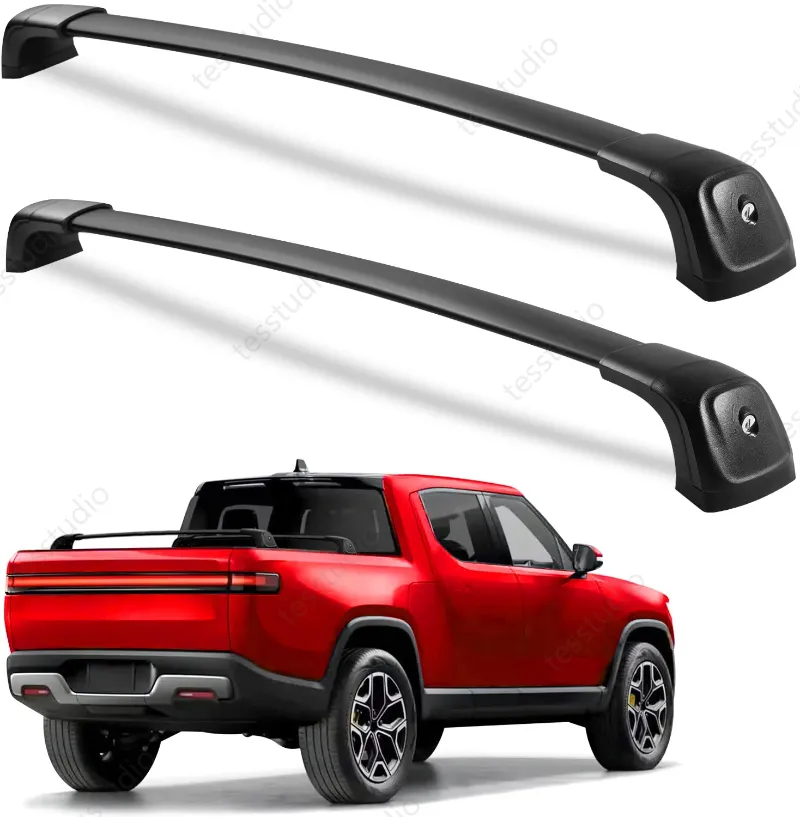
For overlanders who carry roof-mounted gear, a tripod pairs well with accessories like a rago fabrication rivian r1t roof rack, keeping your vehicle’s roof free for other equipment while the dish deploys at ground level.
Before you buy, grab the code for 25% off sitewide to save on your tripod and any other gear you need for your mobile setup.
Final Setup Checklist
Before you power on and rely on your Starlink connection, verify:
- All tripod leg locks are tight and legs are equal length
- Dish adapter is hand-tight in the kickstand socket
- Obstruction check in the app shows clear sky
- Cable has a drip loop and isn’t kinked
- Ballast or stakes are in place if wind is forecasted
- Tripod is at least 6 feet from metal objects that could interfere with signal
A solid tripod mount transforms the Starlink Mini from a finicky portable dish into a reliable internet hub you can trust anywhere. Take ten minutes to set it up correctly, and you’ll avoid the frustration of dropped video calls and buffering streams when you need connectivity most.
Questions
What size tripod thread does the Starlink Mini use?
The Starlink Mini kickstand mount uses a standard 1/4-inch-20 thread, the same as most camera tripods. Some heavier-duty tripods use a 3/8-inch-16 thread with an included adapter.
Can I use a camera tripod for my Starlink Mini?
Yes, if it supports at least 8 pounds and has a 1/4-inch threaded post. However, dedicated Starlink tripods include purpose-built adapters and wider leg spreads for better stability in wind.
How much weight do I need to stabilize a starlink mini tripod in wind?
Add 8 to 10 pounds of ballast (sandbags or water weights) for winds above 15 mph. In gusts over 25 mph, use guy lines anchored to stakes or nearby objects for extra security.
Do I need a tripod if I have the Starlink Mini kickstand?
The kickstand works on flat, hard surfaces, but a tripod is essential on uneven ground, soft soil, or anywhere wind and foot traffic could tip the dish. It also raises the dish to clear low obstructions.
How high should I set my tripod legs for best signal?
Extend legs to raise the dish 12 to 24 inches off the ground. This clears most ground-level obstructions like rocks and bushes while keeping the center of gravity low enough for stability.
Can I leave my Starlink Mini on a tripod overnight?
Yes, as long as you add ballast and check that all locking collars are tight. Inspect guy lines and stakes before bed, and recheck in the morning after temperature changes that can shift the ground.
Products in this guide
Shopping at Tesstudio? See the discount code
25% OFF Sitewide
More in this series
What to Know Before Buying a Rivian R1T Roof Rack1 Aug 20265 minStarlink Mini Power Bank: How to Pick One for Off-Grid Use1 Aug 20263 min Best All-Weather Floor Mats for a Tesla1 Aug 20264 min
 Do Tesla Rim Protectors Actually Prevent Curb Damage?1 Aug 20264 minTesla Model 3 vs Model Y Roof Rack: Which Fits Your Needs?1 Aug 20265 min